


Request a free quote
If you have any problem about our blinds or machines,please write down your needs and problems, our sales will try to answer you in 24 hours. Thank you for your attention!


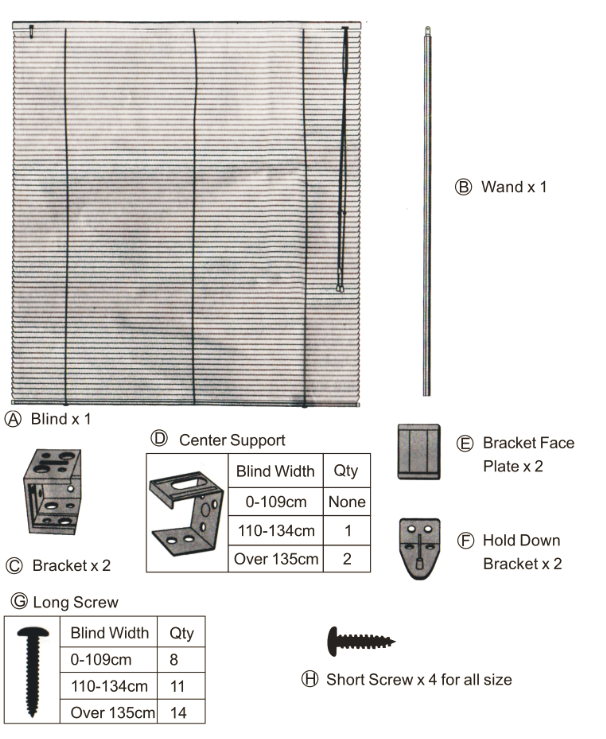
Conponents
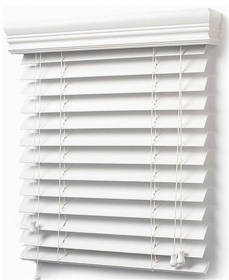
Installation and Assembly [ JSL Heavy-duty 25mm PVC Venetian Blinds]
On window blinds with 3 brackets please ensure one bracket is fitted exactly over the cord lock mechanism
1.Location of brackets
This blind maybe positioned:
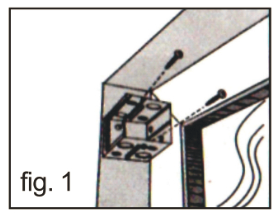
·Inside Mounting-fit to the inside of the window frame.See fig.1.
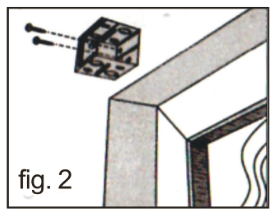
·Outside Mounting-fit to the outside of the window frame.See fig.2.
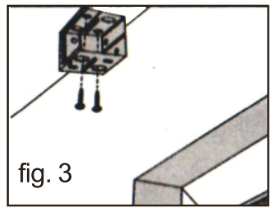
·Ceiling Mounting-Fit it to the ciling above the window frame.See fig.3.
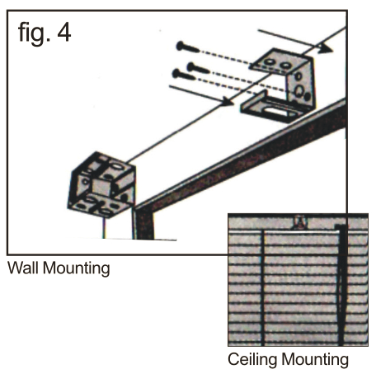
2.To install Center Support
If there are Center support,please ensure one Center support is fitted exactly over the cord lock mechanism.Use long Screw to fix Center Support.The side with 2screw holes should face to the ceiling.The side with 3 screw holes should face to the wall.Ensuring the location allows the blind to sit horizontally when fitted or parallel to the window when fitted on the ceiling. JSL Colorful 25mm PVC Venetian Blinds are easy to install.
See fig.4.
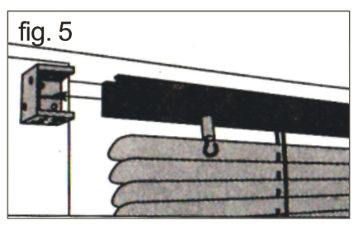
3.Place Blind into the Bracket.See fig.5.
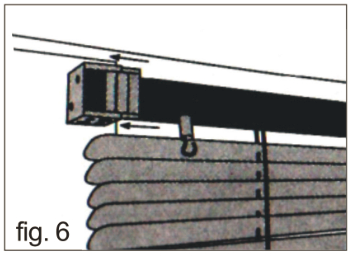
4.Slide the Bracket Face Plate into the Bracket.
See fig.6.
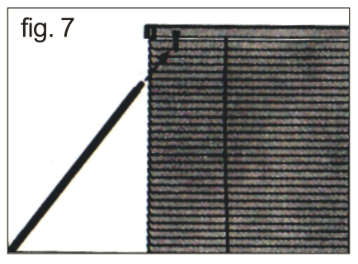
5.Place the Wand into the Blind.See fig.7.Onblinds less 90cm in width the wand is supplied in 2 pieces with a middle connector.
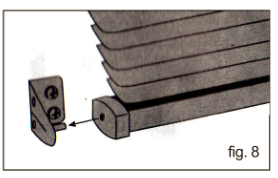
6.Use short Screw to fix the Hold Down Brackets.See fig.8
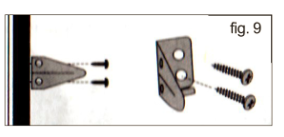
7.Hole on end cap of the bottom rail fits into Hold Down Brackets at the end of the window.See fig.9.
Shorten the blind
NOTE:Before fitting you can custom fit the blind to the correct height.
1.The Height:When the blind is fully lowered.There should be no slats over lapping at the bottom of the blind.If over lapping occurs you can remove slats to allow a custom fit.
2.Hold the blind at the desired location and allow it to fully lower.In the open position the slats should be approximately 2cm apart.
NOTE:In the open position,slats are approximate 2cm apart.A good rule of thumb is to remove 8 slats for every six inches you wish to shorten the blind.
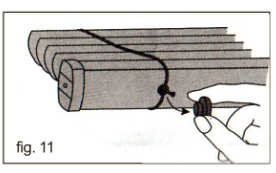
3.Lay blind on a flat surface and remove the caps on the bottom end slat.The caps are attached to the lift cords.See fig.11.
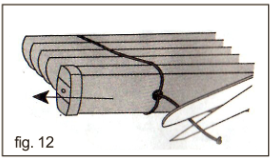
4.Cut lift cord 2cm above cap and remove.Pull the lift cord from these slats to allow them to slide out of the ladder rung.
See fig.12.
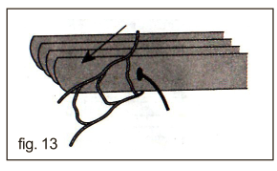
5.Count the number of slats you wish to remove.Pull lift cord from these slats to allow them to slide out of the ladder rung.
See fig.13.
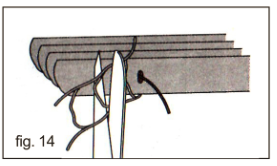
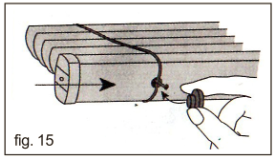
6.Remember to allow for the bottom end slat to be reinserted.Reinsert the lift cord through the cap holes and then insert back through the top and the caps.See fig.14.
7.Knot lift cord directly beneath caps and cut off excess cord.Allow one extra rung and cut off excess ladder,now tuck remaining ladder into the bottom end slat cap holes.Replace caps.See fig.14 and 15.
8.After blind is shortened you may wish to adjust the pull cord length.Raise up the plastic cover over the knot and cut off excess cord and then re-knot.
To operate blind
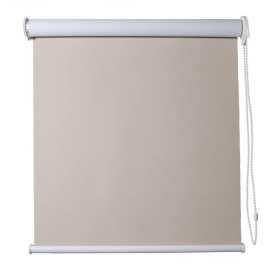
Lowering:Hold cord at eye level and push to left pulling down gently until cord lock releases.Allow cord to slip through fingers until blind reaches desired level.Move pull cord to the right and the blind will lock automatically. As you Know, our Size Available 25mm PVC Venetian Blinds are custom made, which will offer you a pleasure home or office life.
Raising:Pull cord downward until blind reaches desired height.release cord,the blind locks automatically.
Tilt:Rotate "Wand"on left side of blind to attain desired slat positions.
Important:Always tilt blind horizontally before raising or lowering the blind,this increases the life of the blind.
Previous :
High Fashion Vertical blindsNext :
How to Shorten The Venetian Blinds ?If you have any problem about our blinds or machines,please write down your needs and problems, our sales will try to answer you in 24 hours. Thank you for your attention!
Email :
jslwx6@jsl-blinds.comTel :
+86-020-34751118-616